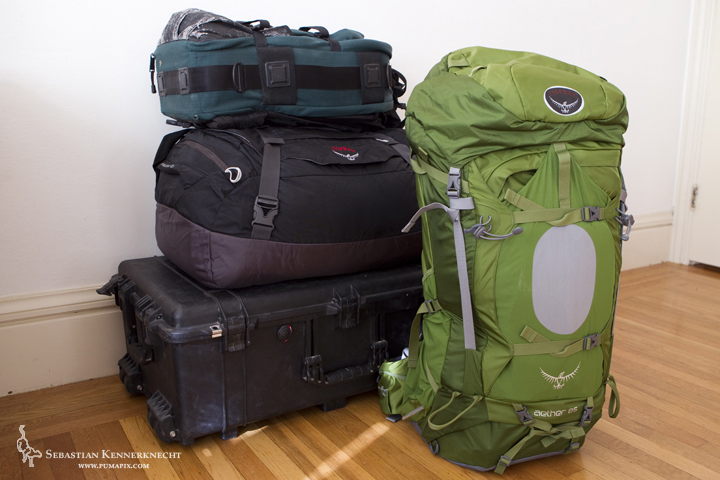
All 225 lb (102kg) of gear packet up, ready for international departure!
Photographing wildlife in your local state park is one thing, traveling across the world to try and capture images of elusive species in remote areas is another. You have to start thinking beyond picture taking to managing staying out in the field for extended periods of time. Convenience stores aren’t around every corner and if you are missing something you may just be plain out of luck. Though the list of things to bring is extensive I wanted to explain my top ten essentials that I take every time I head into the field.
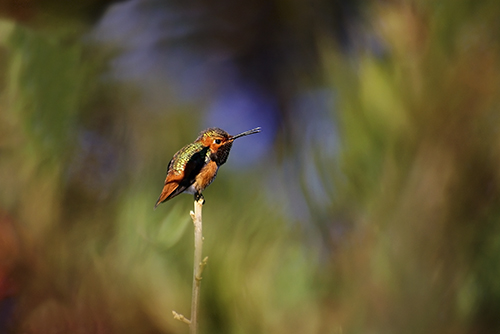
1. Camera Gear
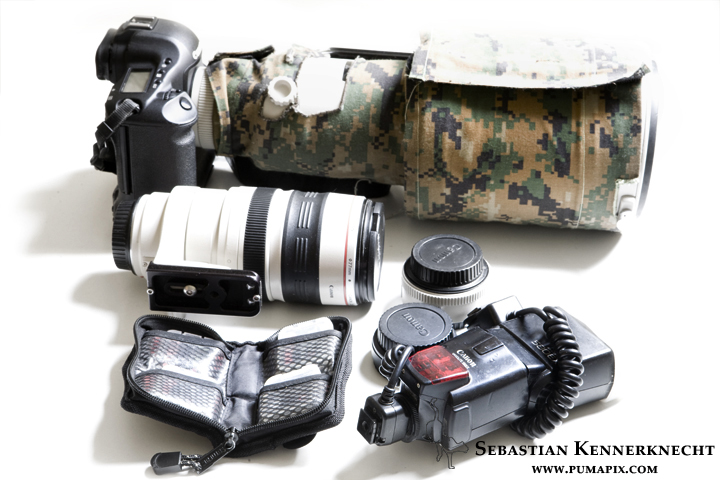
About half the photography equipment I bring on assignment (not counting camera traps, for those multiply everything by four)
Let’s get the obvious out of the way: without camera equipment you wouldn’t be doing much photography. Having multiples of items, especially cameras, is essential. This way, if something breaks, you don’t have to give up shooting altogether. I have had two cameras break on me while I was on location, though inconvenient, it didn’t halt my photography as I could just keep going with the back-ups.
2. Paperwork
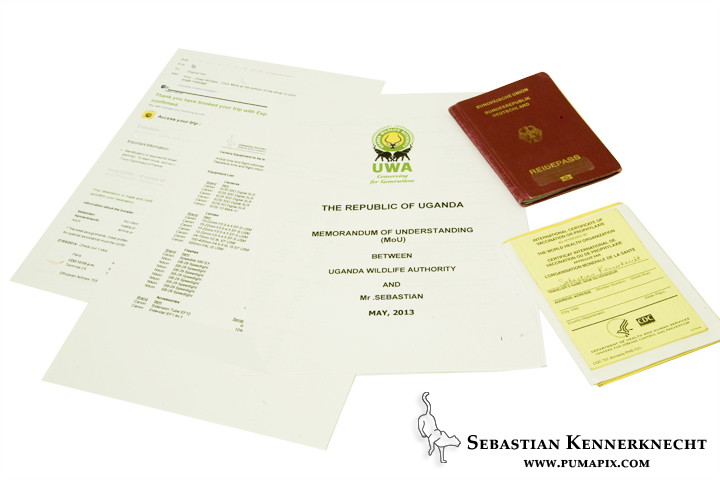
Passport, immunization records, photography permits, and tickets.
In most foreign countries you can’t just show up, pull out your camera, and start shooting — especially not for extended periods of time. Many countries require you to get visas before you even depart your home country. Others require you to provide your immunization history to make sure you aren’t bringing in any disease or may be contracting on during your stay. Finally, if you are working in any public areas, you most likely need a permit to conduct your photography project from the governmental department responsible for the environment (sure makes shooting at home sound way more appealing, doesn’t it?!).
3. First Aid Kit
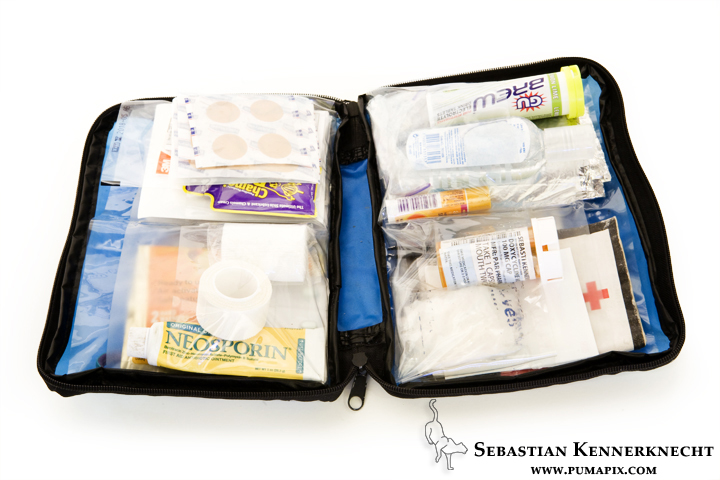
The first aid kit I bring (make sure yours is waterproof as well)
Alright, so you have made it to your remote location finally. You are pumped up and ready to conquer all photography challenges when a major bout of diarrhea leaves you weak and lying in bed for days. You get a bacterial infection and have no way of treating it. A simple injury can all of a sudden become life threatening. All of these scenarios are quite possible, and could have happened to me, if I did not have a first aid kid to nip the problem in the bud right when the issue started to present itself. It’s not much to carry, but it can literally save your life. Check out the CDCs website to see what health issues you should be prepared for at your destination.
4. Water Purification
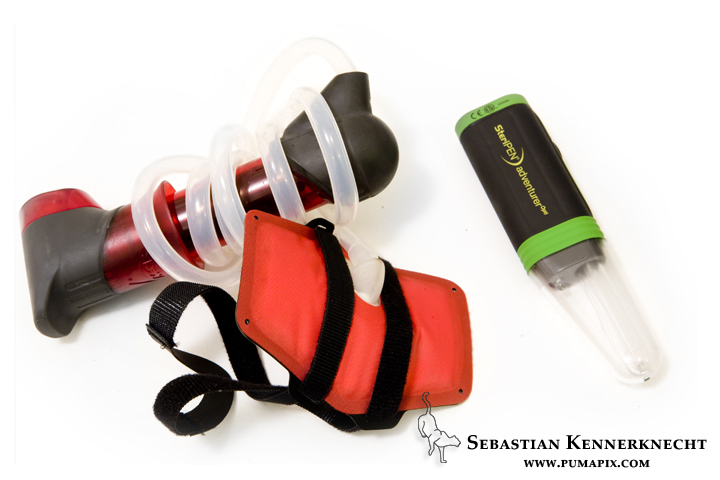
Water filtration system including a pump and steripen
That brings me right to my next item, well items really. We take clean water for granted, but guess what, in most parts of the world that is simply not the case. So will you just bring gallons and gallons of water with you? Carrying the extra weight is just not feasible. So you have to be able to purify the water you naturally encounter in the environment. A water pump (for sediment extraction) along with a steripen (which kills the bacteria and viruses) are essential to alleviating any kind of water problems.
5. Rain Protection
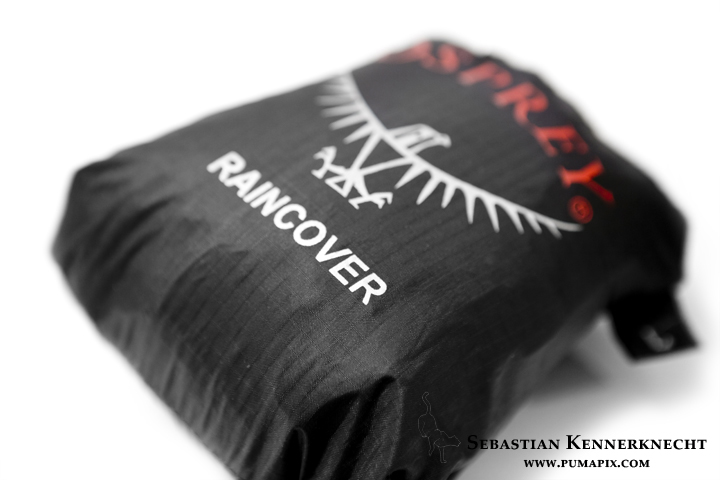
Osprey raincover – perfect for most rain situations. If its a storm, I place items in waterproof bags.
Talking about water, in the tropical environments I have worked in the most, finding water is no problem, simply because it rains in these ecosystems almost daily. Great for drinking water, not so great for keeping your photo and traveling equipment dry. I always carry raincovers and waterproof bags with me, so if a downpour comes in, I know all is safe.
6. Silica Gels

Silica Gels – I have even needed these in the desert
Related to the waterproof bags are silica gels. In tropical environments, even when it isn’t raining, the humidity is absolutely absurd (my baseball hat was growing three different species of fungi the last time I was in Borneo), which can lead to health issues and fungus growing inside of your photo gear. To ensure that the air within your bags is less humid, silica packets are absolutely essential.
7. Pocket Knife
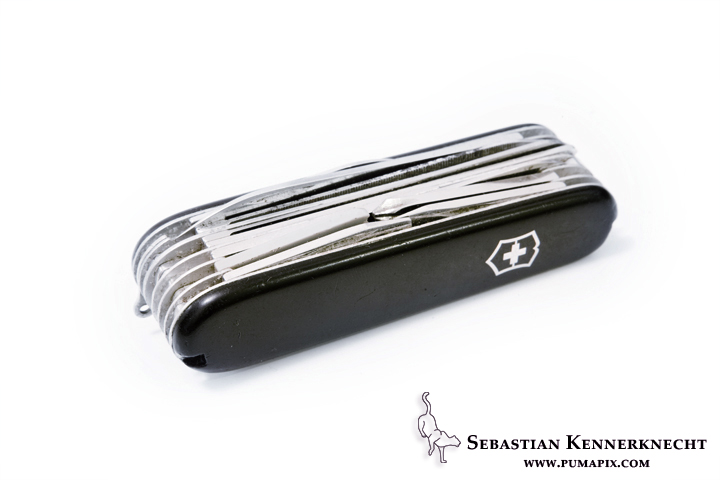
Most important item I own (partially due to sentimental reasons) — my grandpa’s pocket knife
Another duh item really. It allows you to eat food more easily, cut most anything, and repair a lot of your kit. I use my pocketknife daily when I am in the field and it is the item I would least want to lose.
8. Hand Sanitizer and Toilet Paper
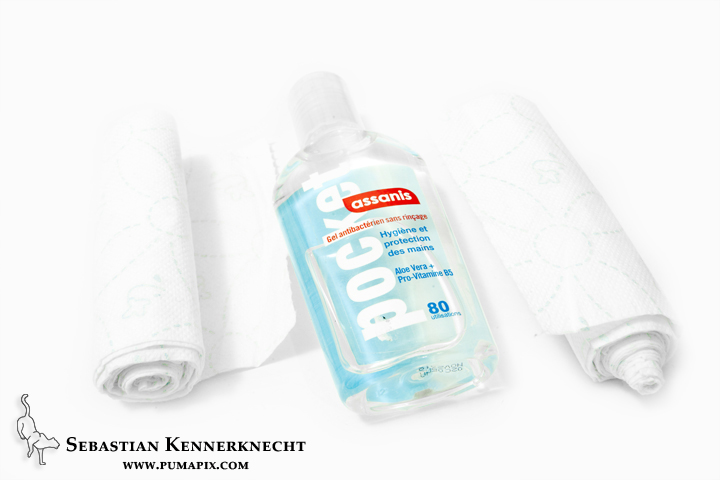
TP and Hand Sanitizer – explanation is hopefully unnecessary
Going to the bathroom in the wilderness is somewhat of an acquired taste. Whether you hate it or don’t mind it, you won’t get around it when you are in the field for extended periods of time. To do things properly though, both toilet paper and hand sanitizer are required. If you don’t have toilet paper, you can always use a leaf, but grabbing the wrong kind of vegetation will guarantee that you won’t forget the tp in the future.
9. External Hard drives
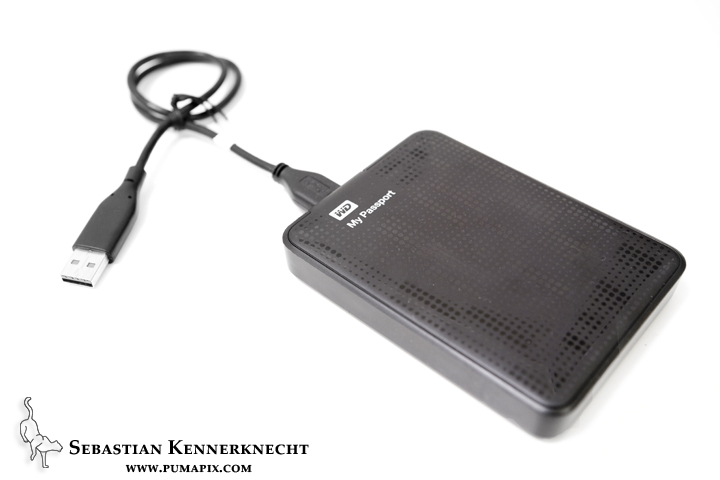
External hard drive – I have two of these that are clones of each other
All is well, you are safe, your equipment is safe, and you are having amazing experiences taking amazing pictures. Life couldn’t be better. You are filled with happiness as you see your pictures loading onto your computer and there is no sense of nervousness as you do so because you thought ahead and brought plenty of external storage. When I am in the field, each photograph I take is stored on three different devices, so even if one fails, I still have two back-up copies. I would recommend doing the same for you.
10. Compass and GPS
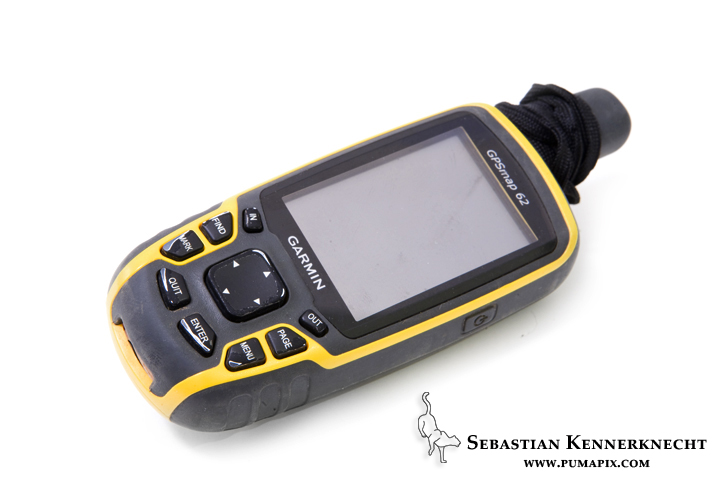
GPS – life saver (literally)
Assuming that you’d like to return from your adventurous journey, I would recommend bringing both a compass and a GPS to lead you back to civilization. Having worked in the desert and the dense jungle now, I can attest that these two items are probably the biggest life savers. When you are totally away from civilization it is incredibly easy to get turned around. I have stepped 10 feet off the trail in the jungle, closed my eyes, spun around, and had no idea where the trail was when I open my eyes again. You may think all you need is a GPS, but that would also be incorrect. My good friend Andy Hearn and I have walked in circles in the rainforest in Borneo trying to go straight, even while looking at the GPS the whole time. Using the GPS with the compass allowed us to get a proper bearing and get back to our camp.
Food: I didn’t list food as a top ten essential because it isn’t something I bring from home; I buy the necessary supplies locally before heading into the field.
Power: If you are out in the field for more than a week at a time, I’d highly recommend setting yourself up so you can charge your camera batteries with solar power. Otherwise you are carrying a ton of batteries around. (Batteries would have made the list if I didn’t take them out before traveling due to weight restrictions — trust me paying for an extra 175lb in excess baggage fees is not fun, so any weight you can lose is worth it).
As mentioned this list can go on and on, but I think this is a good start. Am I missing something on this list that you think is essential? Let us know in the comments!
Do you want to know less about the gear and more about how I take my pictures? Join me on one of my workshops!